Click images below for larger versions
The problem
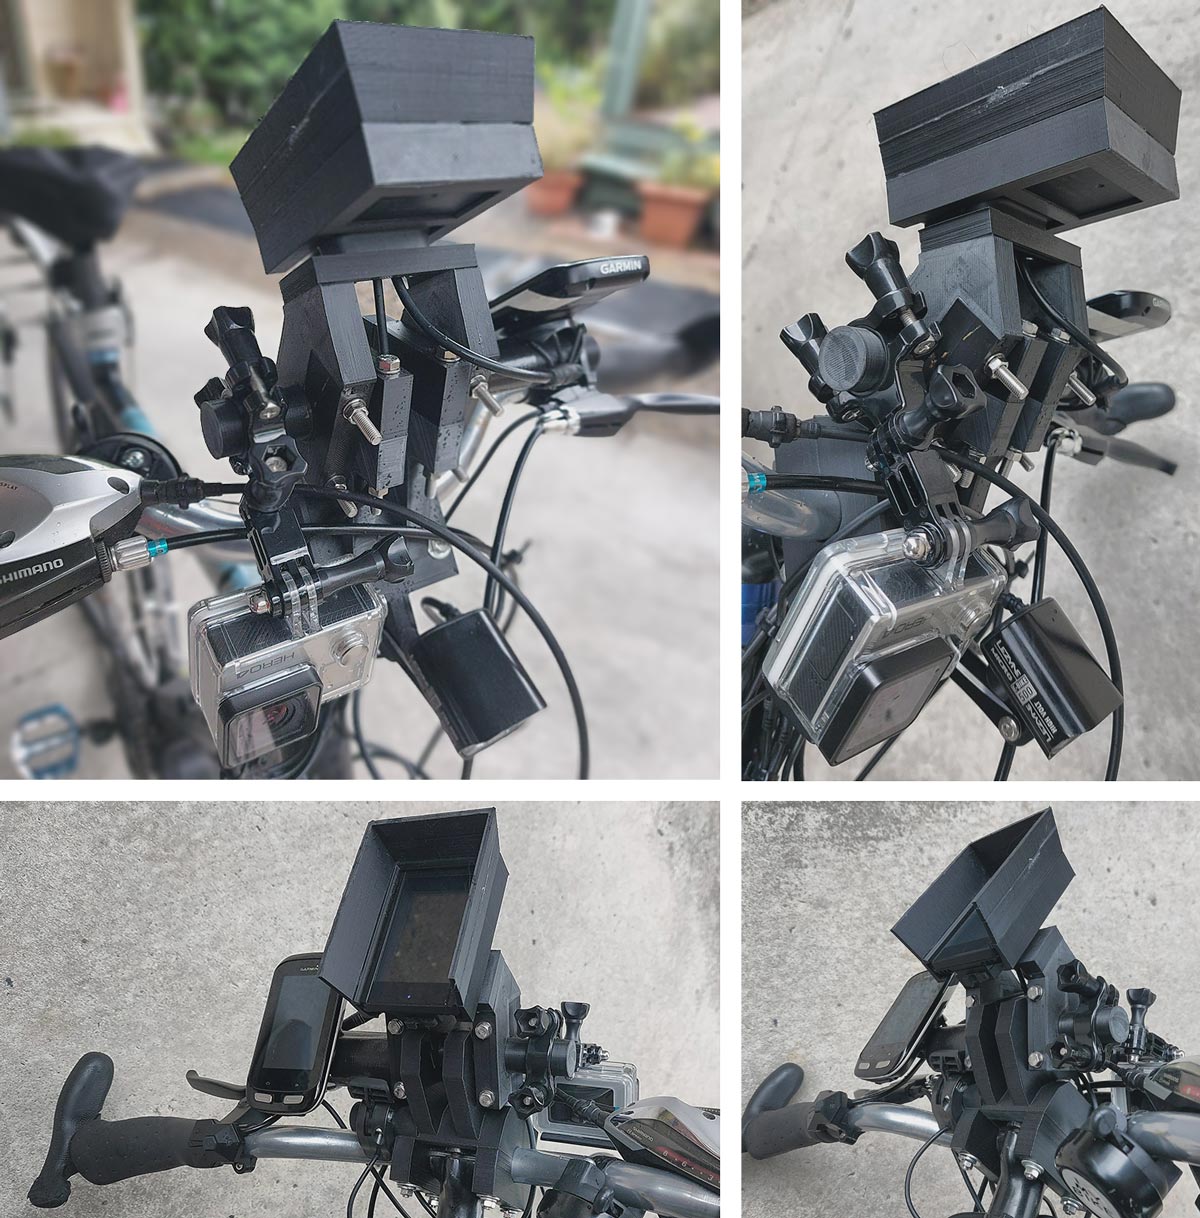
The eBike handlebar mount for the Display unit, Garmin, light etc. was a bit of a mess, and the metal accessories bar clamped to the handlebar wouldn’t stay put, no matter how tight it’s nuts and bolts were.
The solution
A custom 3D printed mounting bracket designed in Lightwave, of course!
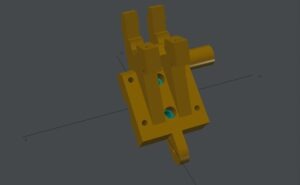
The final design for the bracket comprises of a lower section clamped to the handlebars, sitting over the headset clamp so it can’t move around, and an upper section comprising of two parallel arms supporting a custom mounting plate for the Display unit.
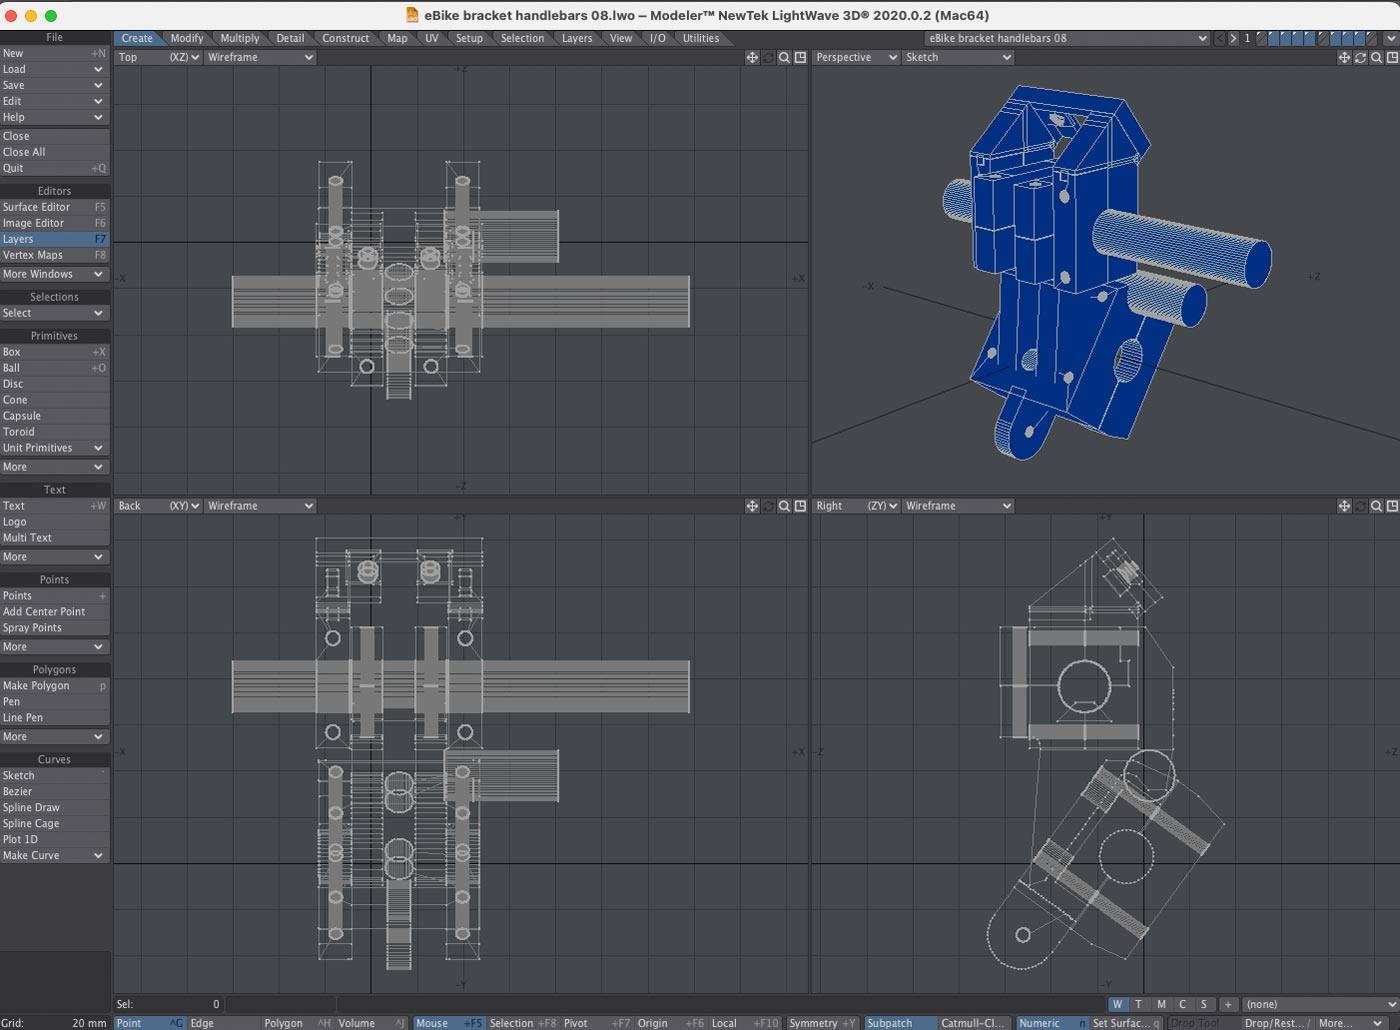
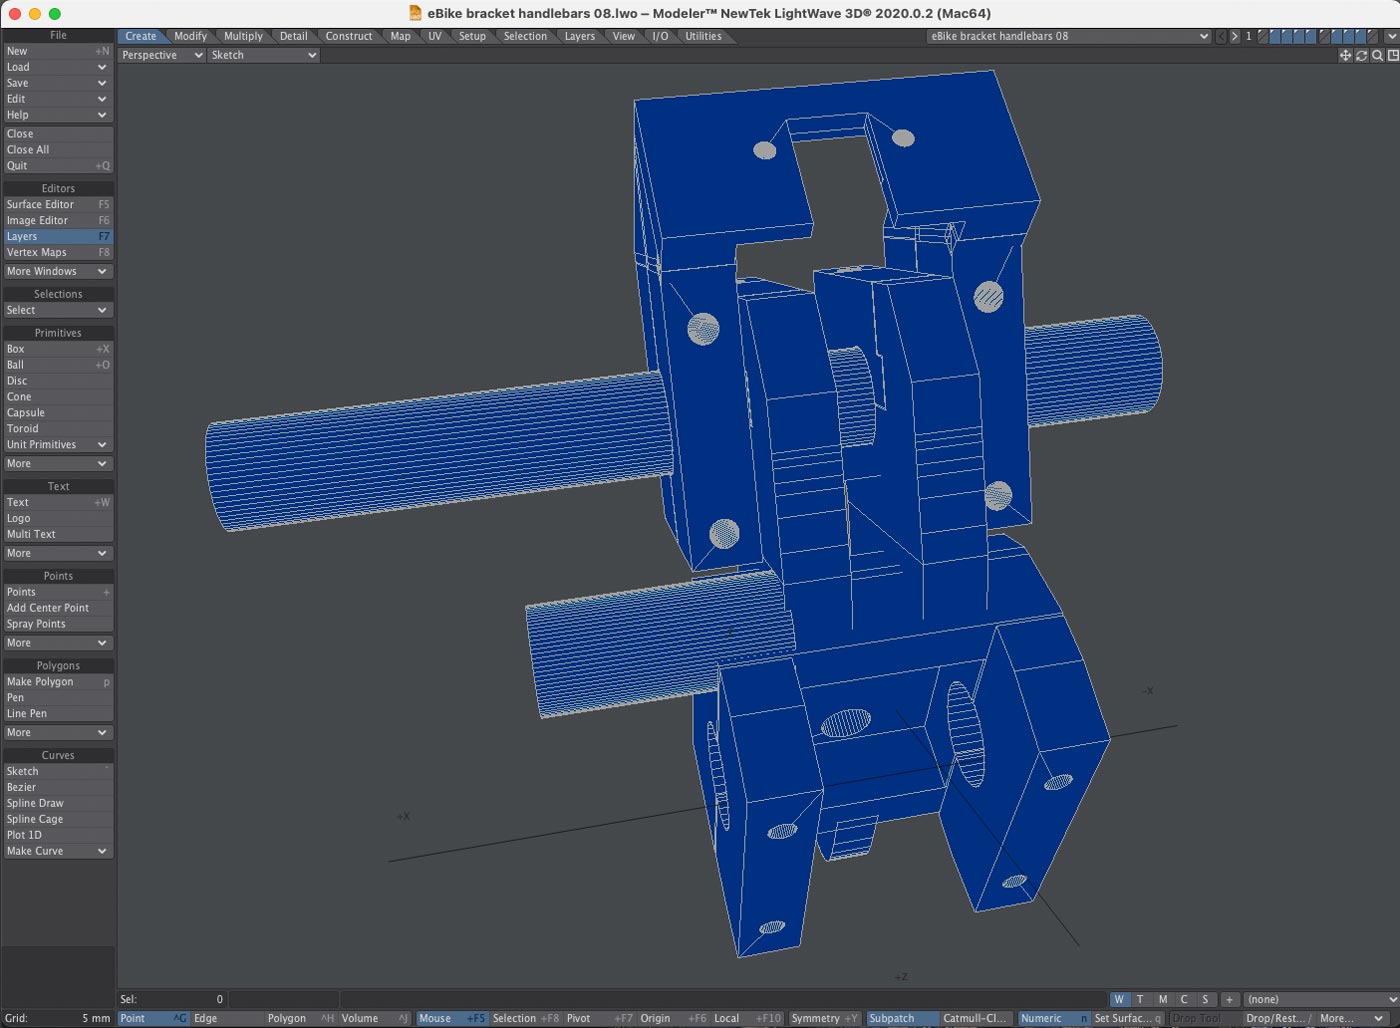
Below: Lightwave 3D, from the rider’s point of view.
The long accessories bar at the top: on the left side is for the Garmin; the short top bar at the right is for hanging a GoPro. The short bar sticking out on the left at the bottom is for the throttle. I hardly ever use the throttle and wanted it to be out of easy reach so I don’t accidentally activate it.
To make desiging the bracket easier, I first measured the existing handlebar and head stem clamp (green) and modelled them as stand-in objects. It was then a matter of designing the bracket to fit over the stand-ins.

Stand-in objects: Garmin (yellow), throttle (red), Display (bright green), handlebar (grey), headset clamp (green)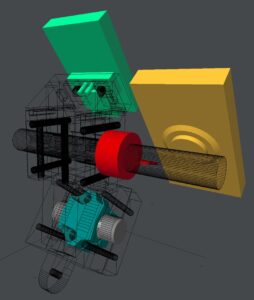

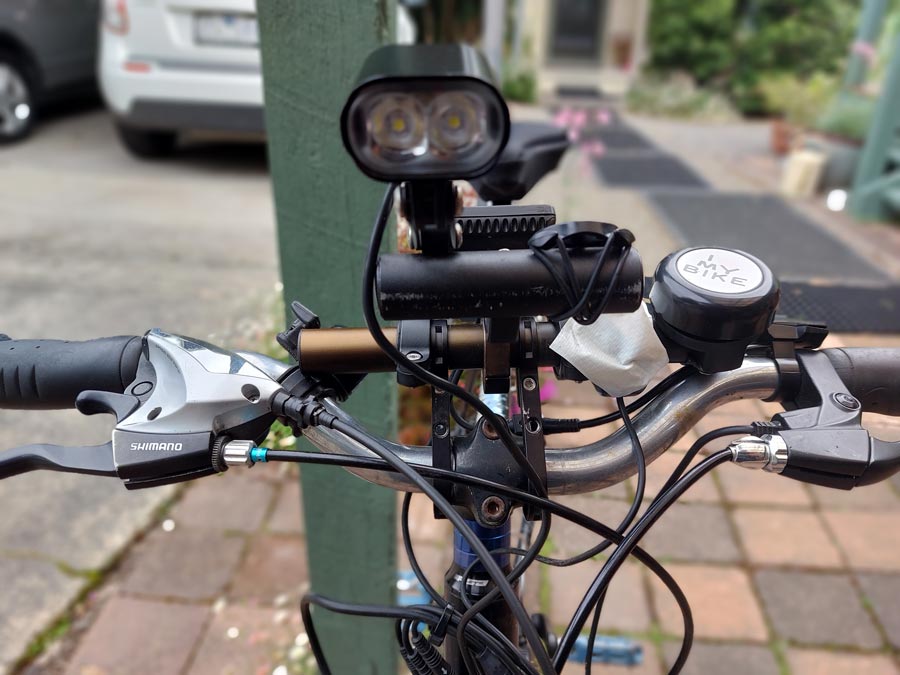
Bottom front view of the bracket fitted over the headset clamp (green).The protruding lug with the hole in it is for mounting the headlight.
Top front view of the bracket over the headset clamp (green). Holes have been made in the bracket to enable the headset clamp bolts to be adjusted without having to remove the bracket.
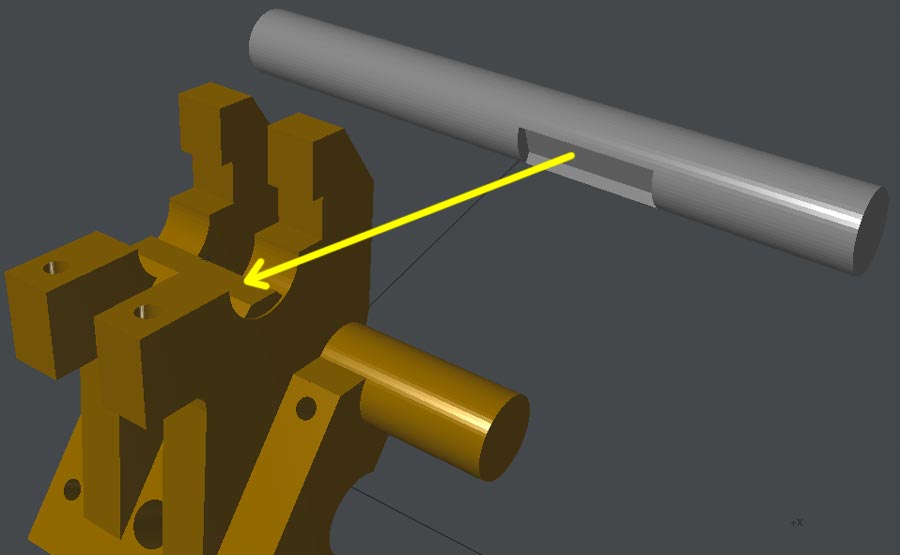
In order to facilitate removal of the whole bracket if necessary, the new accessories bar needed to clamped into place, rather than glued. To stop it from rotating and moving around, the bar was designed with a slot to engage a lug on the bracket mount lower section.
Printing
Printing the parts on the Snapmaker A350. You can see on the Snapmaker display screen that the main lower part took just over 10 hours to print – and that was on the Snapmaker’s Quick Print setting!


The bracket lower section with its clamps. The Version 1 clamps were too weak and snapped when the bolts were tightened. The redesign of Version 2 fixed the problem.
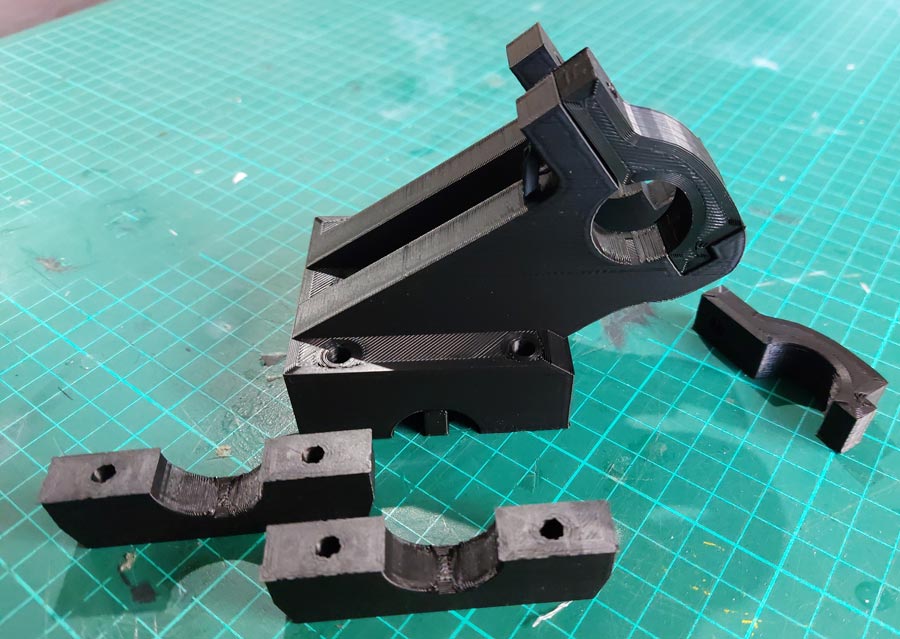
Version 1 (too weak), Version 2 (stronger!)
As mentioned above, some of the bracket pieces for clamping around the handlebar turned out to be too weak in critical places, and snapped when the fastening bolts were tightened. In designing the improved, stronger Version 2, I decided to ditch the original Display bracket and incorporate a new Display mounting plate.
Below: Version 1, retaining the original Display mounting bracket.
The curved clamps between the bracket arms snapped when the bolts were tightened.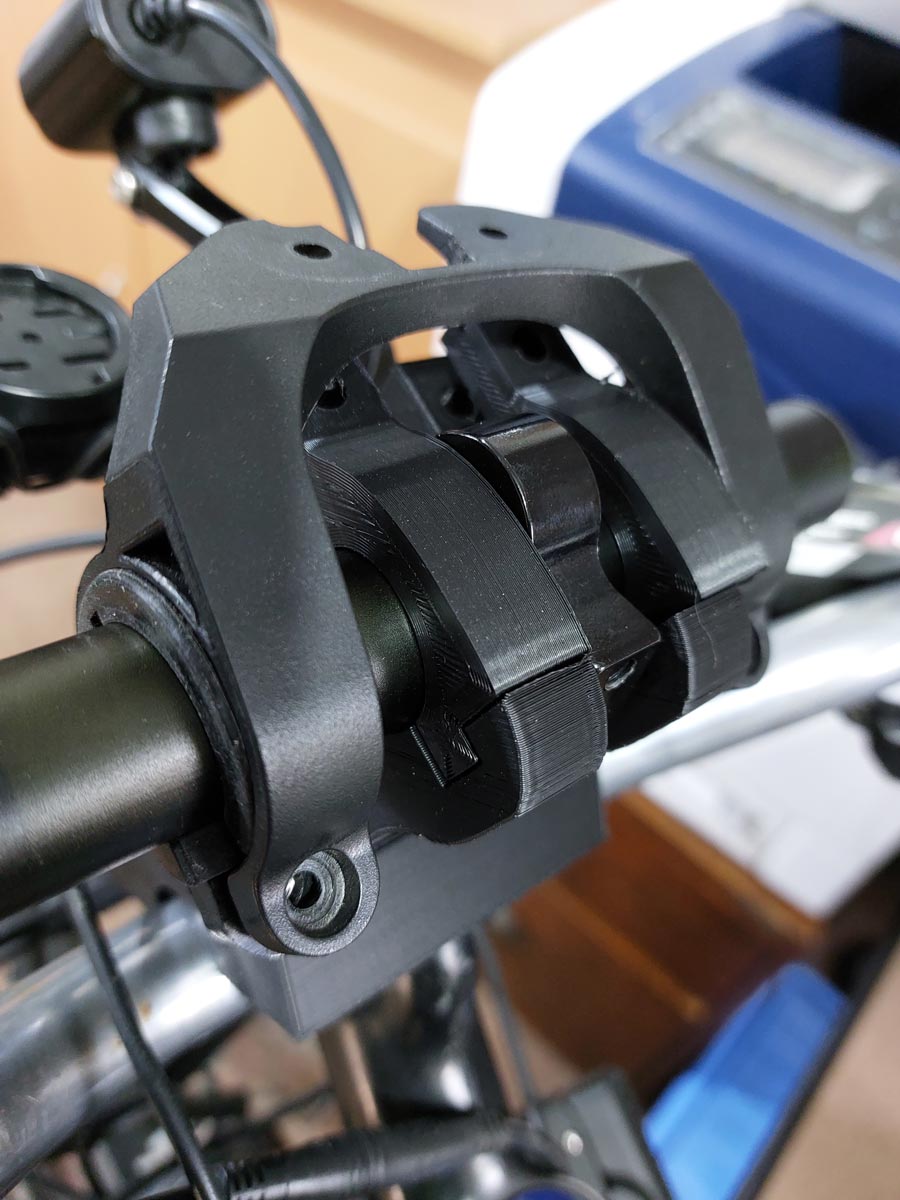
Below: Version 2, new Display mounting plate, to be incorporated into the top section of the main bracket. As this was to be printed separately and SuperGlued into position, protruding lugs were added which would match slots in the bracket arms. For a snug fit, there was a gap of 0.2 mm between lugs and slots. The Snapmaker can easily print that sort of tolerance even on its Quick Print setting.

Due to wires protruding from the rear of the Display, it was critical to design the mounting plate to accommodate the wires in such a manner as to not damage them. To ensure a good fit, a simplified stand-in of the Display unit was made (green).